AMS results for Bambu Lab X1-Carbon

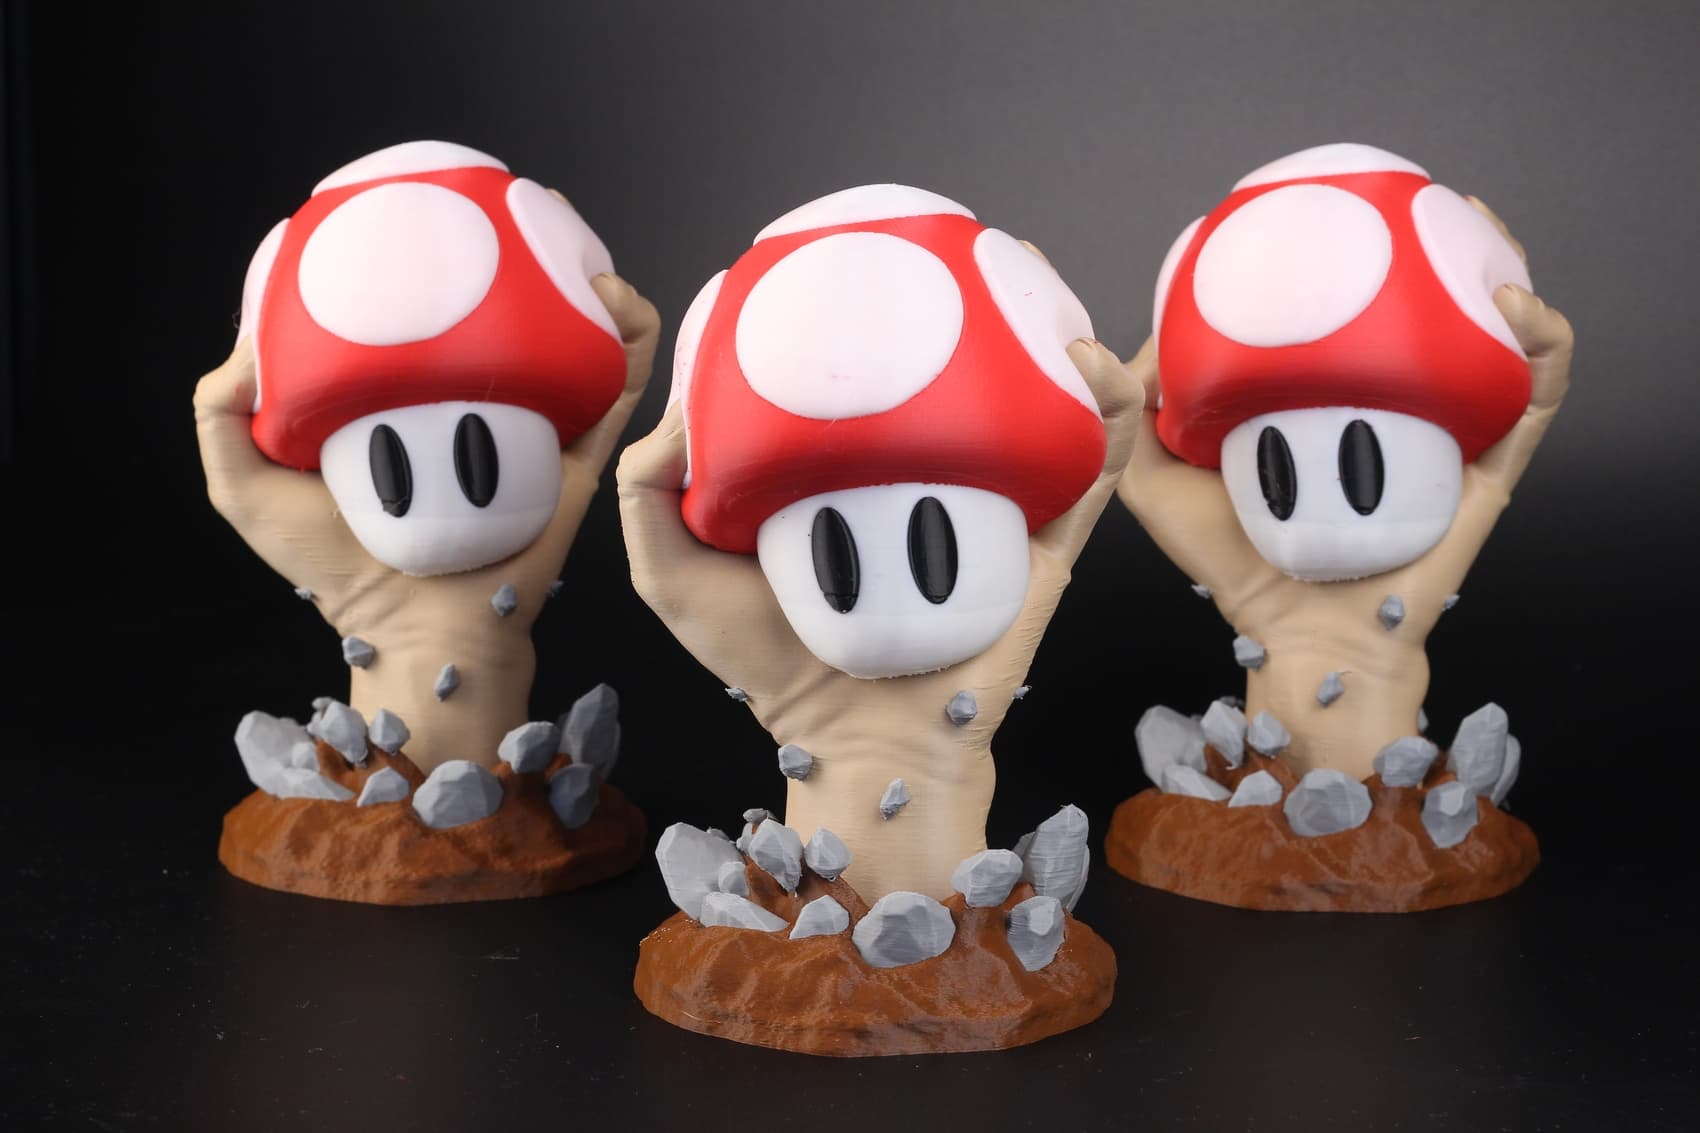
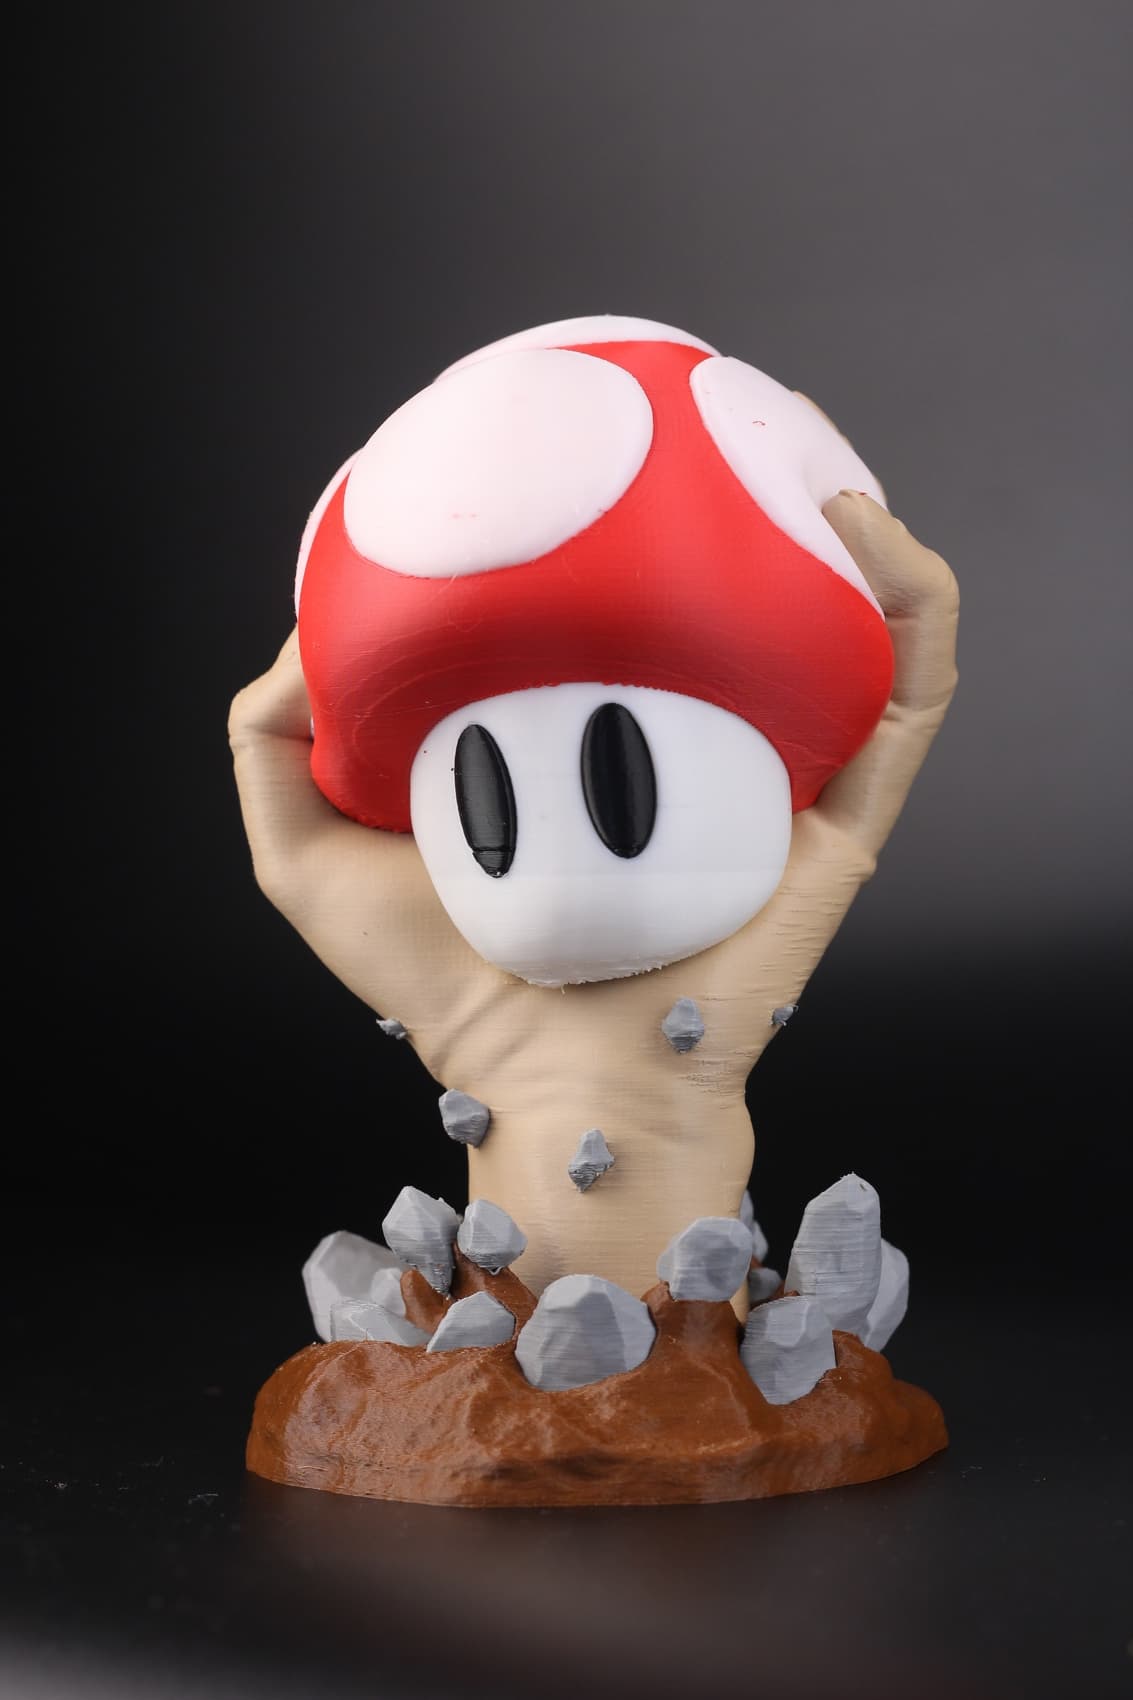
Let me first start with some beauty shots. The Resurrection model from Kaoss is really cool.
Resurrection from Cpt Kaoss on Bambu Lab X1-Carbon1
Resurrection from Cpt Kaoss on Bambu Lab X1-Carbon2
Resurrection from Cpt Kaoss on Bambu Lab X1-Carbon3
Resurrection from Cpt Kaoss on Bambu Lab X1-Carbon4

Now that you’ve seen how you can print with the AMS, let’s talk a bit about the printing issues I have encountered during this print.

The models were sliced with Bambu Slicer. I wanted to do four models but the slicer was using about 12GB of RAM and slicing took more than an hour. Sure, it wasn’t on the fastest computer out there, but I still expected a bit better. I only managed to slice three models, without crashing.

I tuned the purge amount in the slicer, according to the settings below:
AMS purge

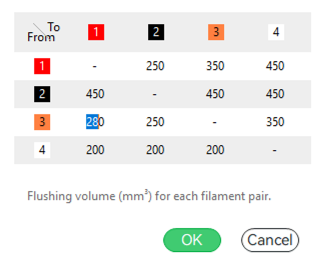
I used a lot more purge for darker colors like black and red when transitioning to lighter colors, but for white, I need an extra ~100mm3 for a cleaner output. I also didn’t use a purge tower hoping that I would use less filament but this caused some small zits of filament on the model which was printed first.
color zits X1-carbon AMS
These small zits can be solved with a purge tower, so I think there’s no way to completely get rid of it. You might even get a faster print by shortening the purge amount in the back chute and increasing the size of the purge tower.

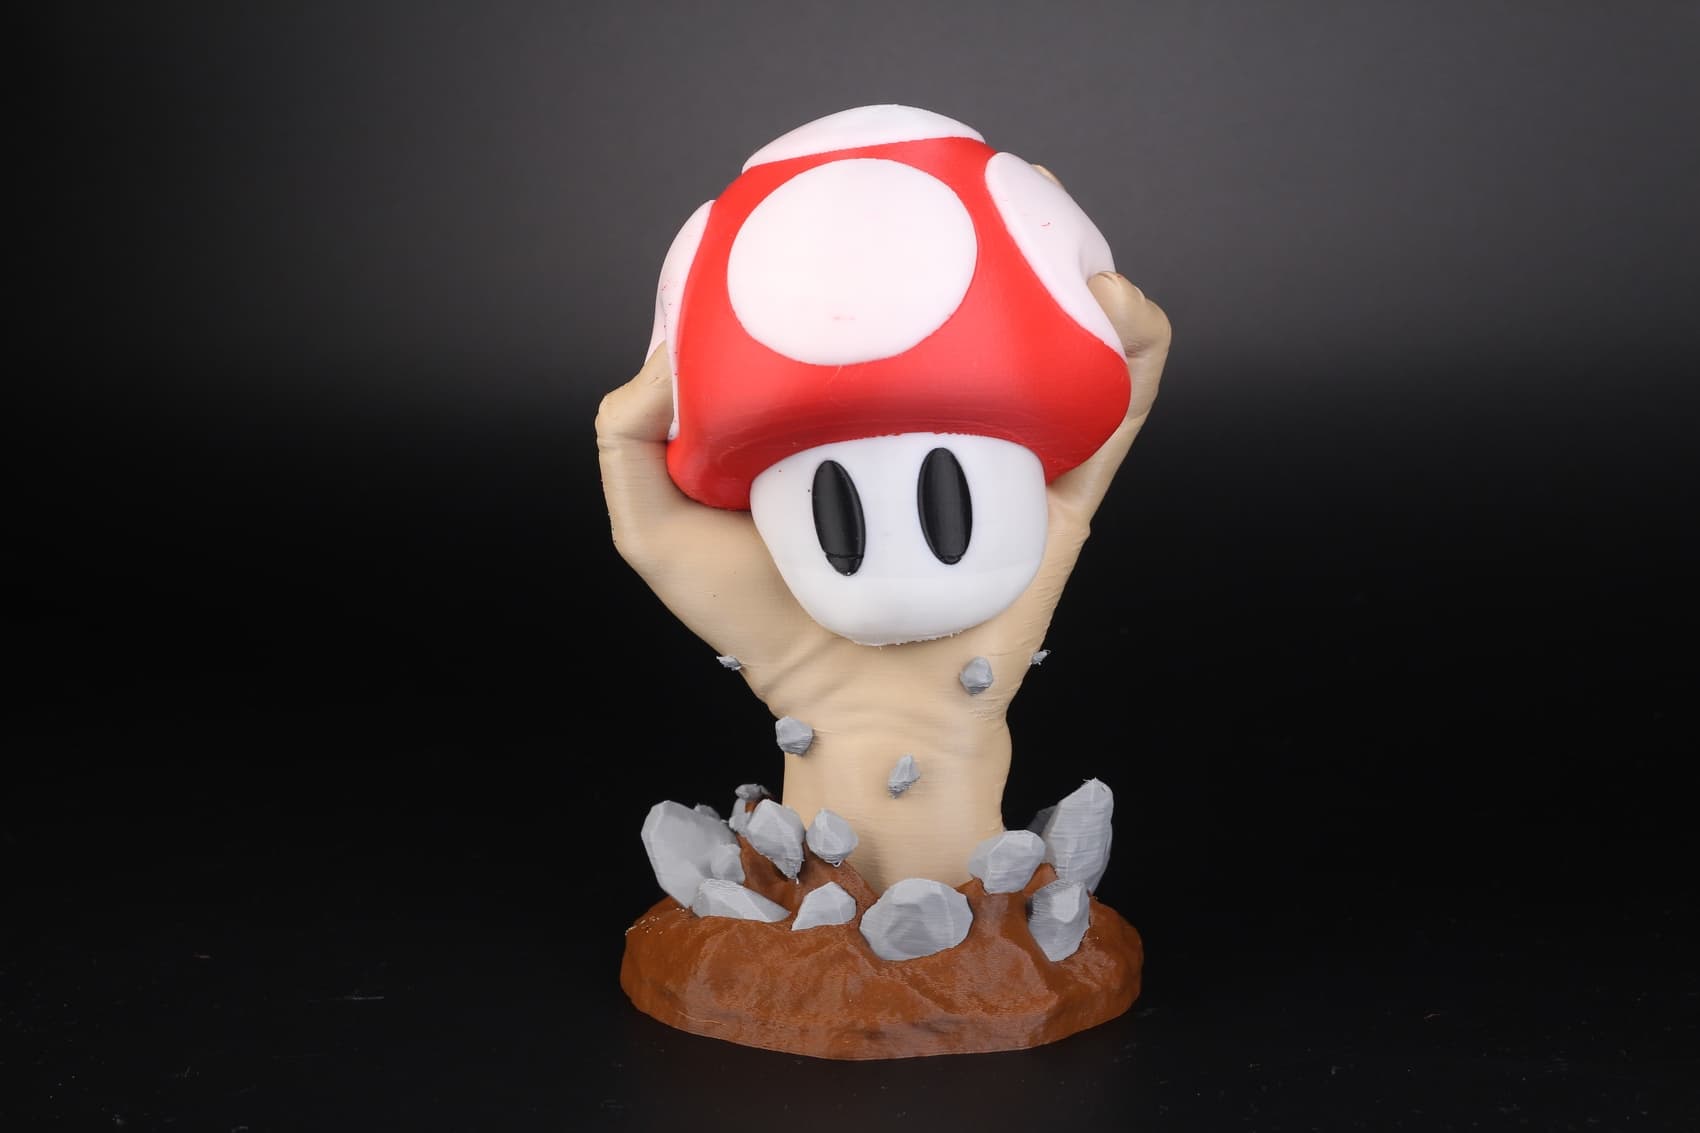
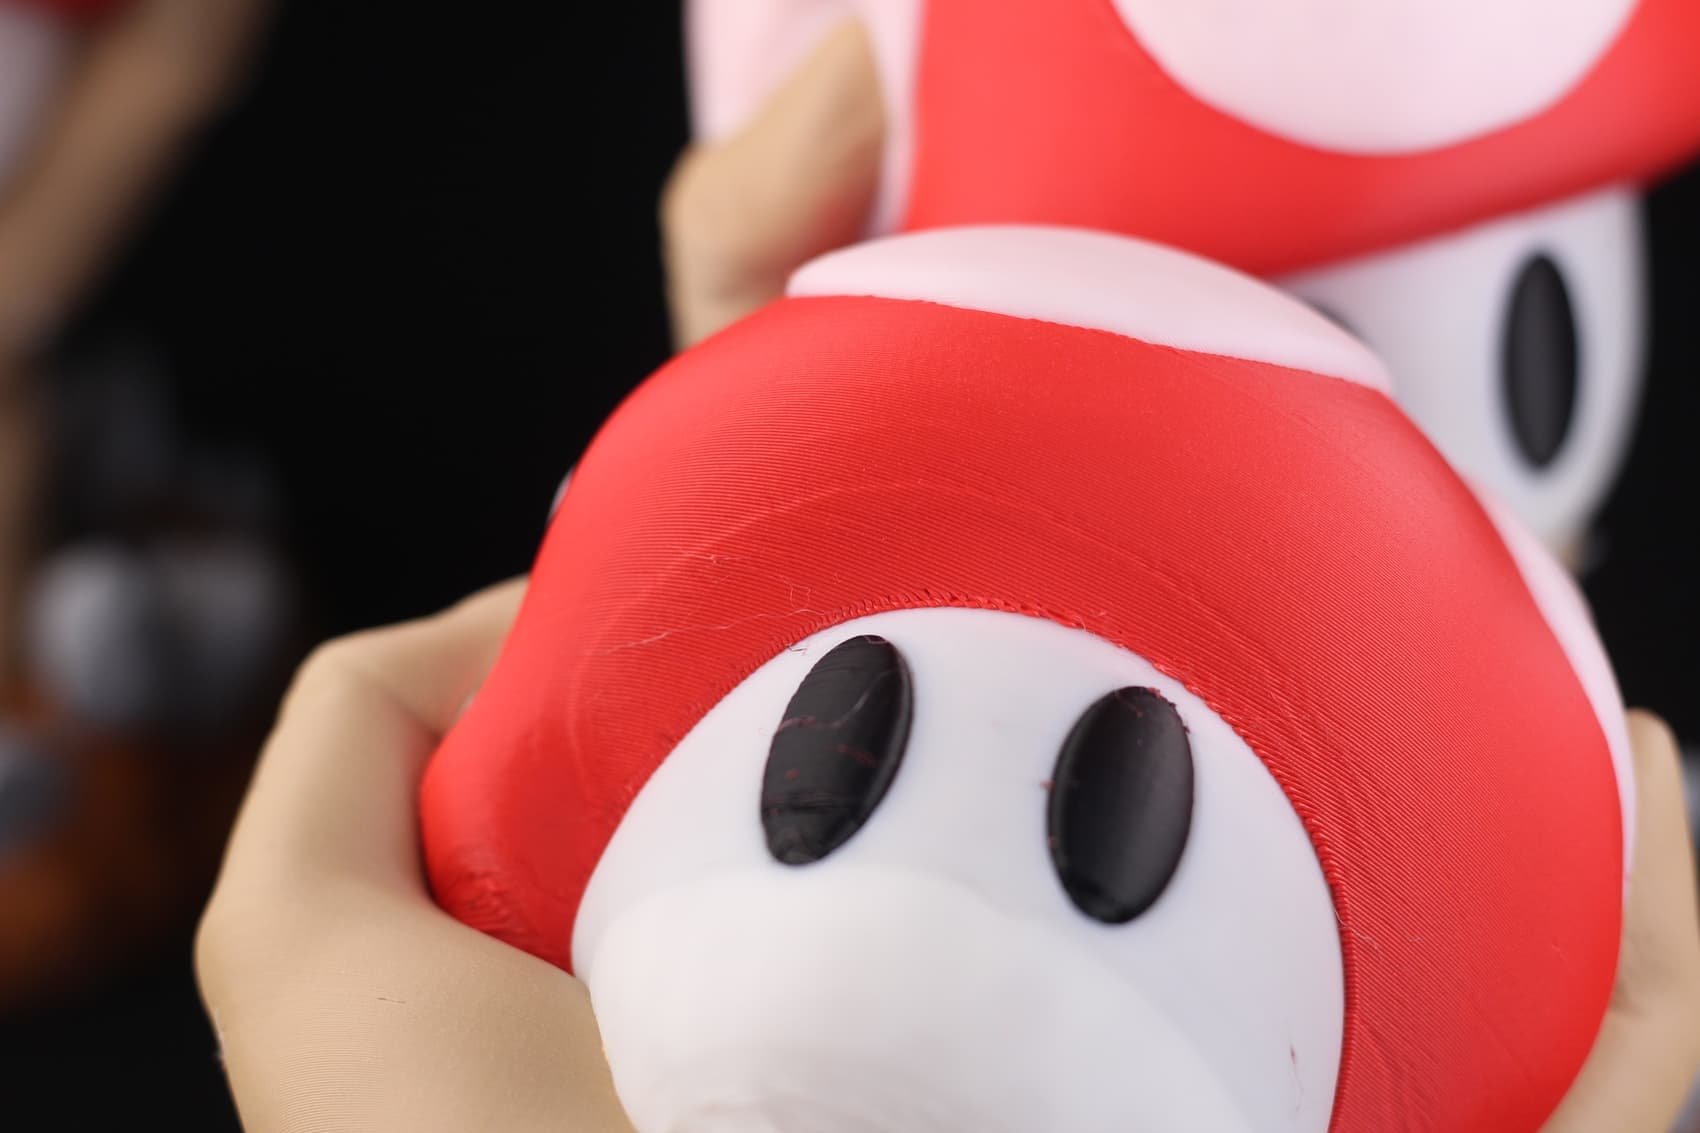
In the image below, you can also notice where the printer slowed down for overhangs. The extrusion consistency changes and this can also be seen on the model. This issue could be fixed by tuning the print speeds so that the external walls have the same printing speed as the overhangs.
Inconsistent extrusion rate for overhangs

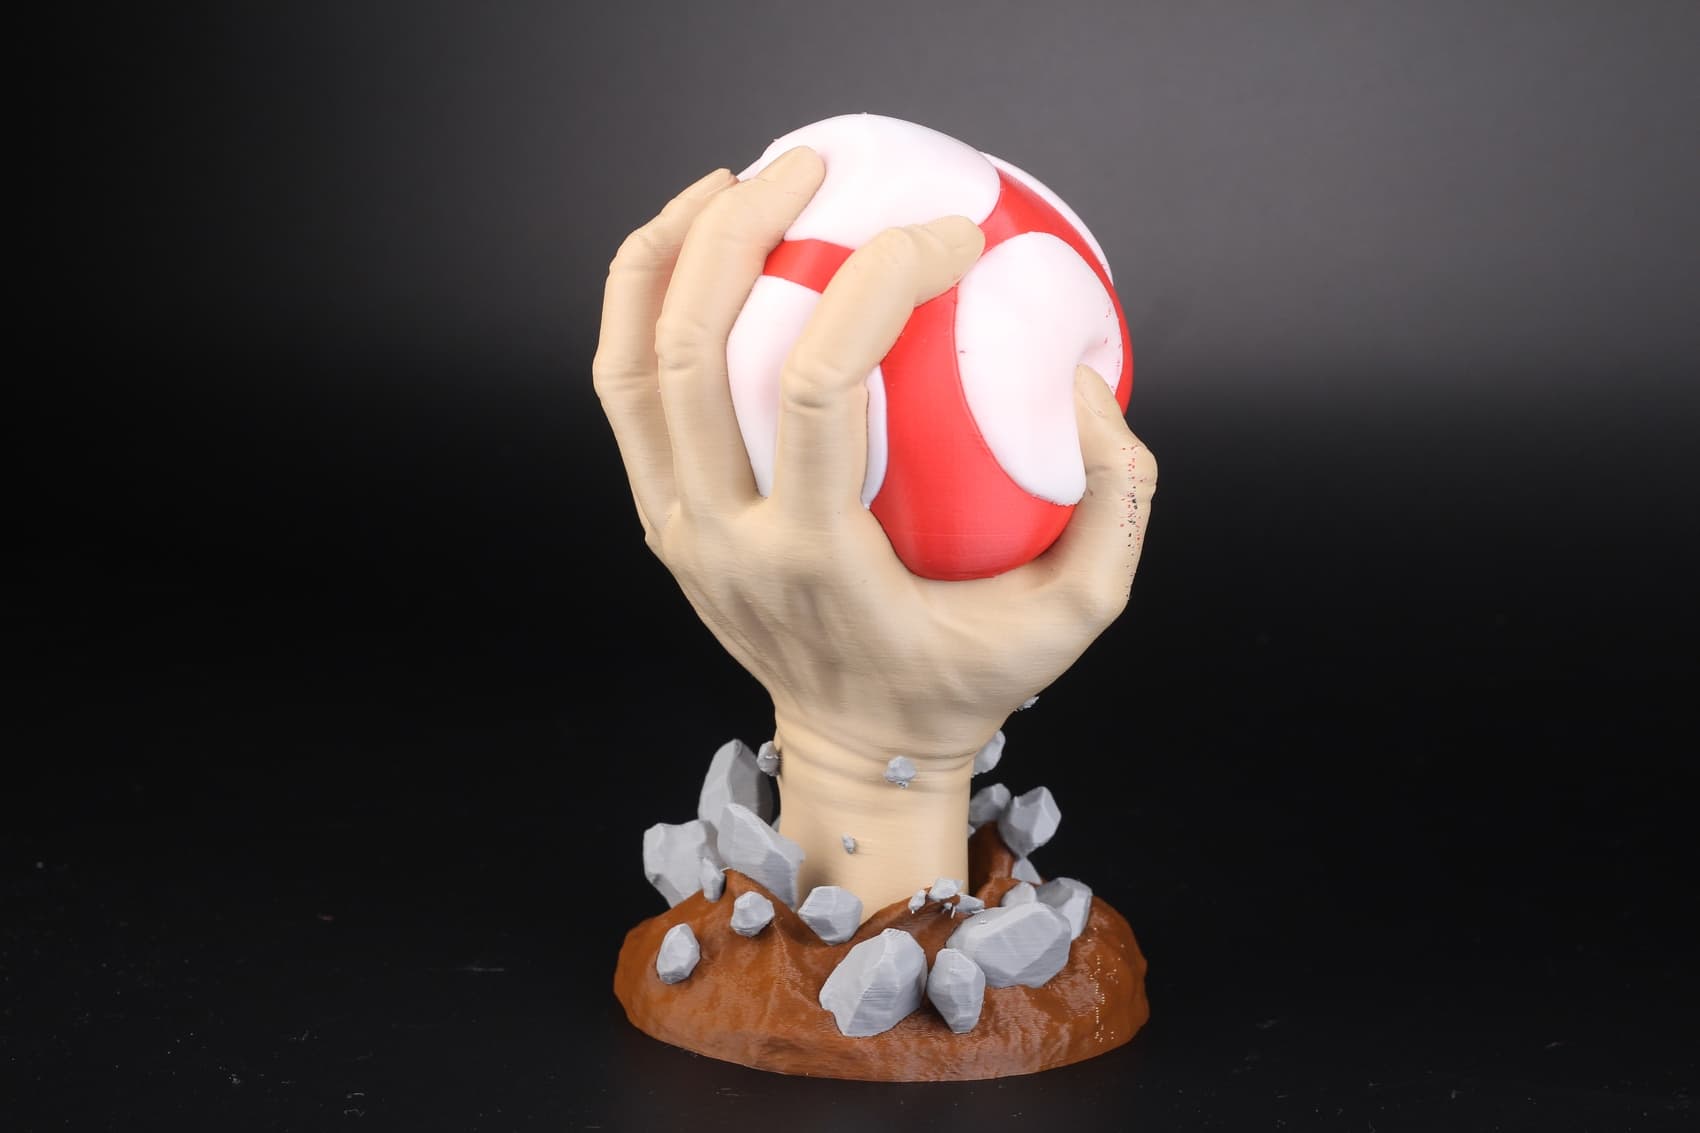
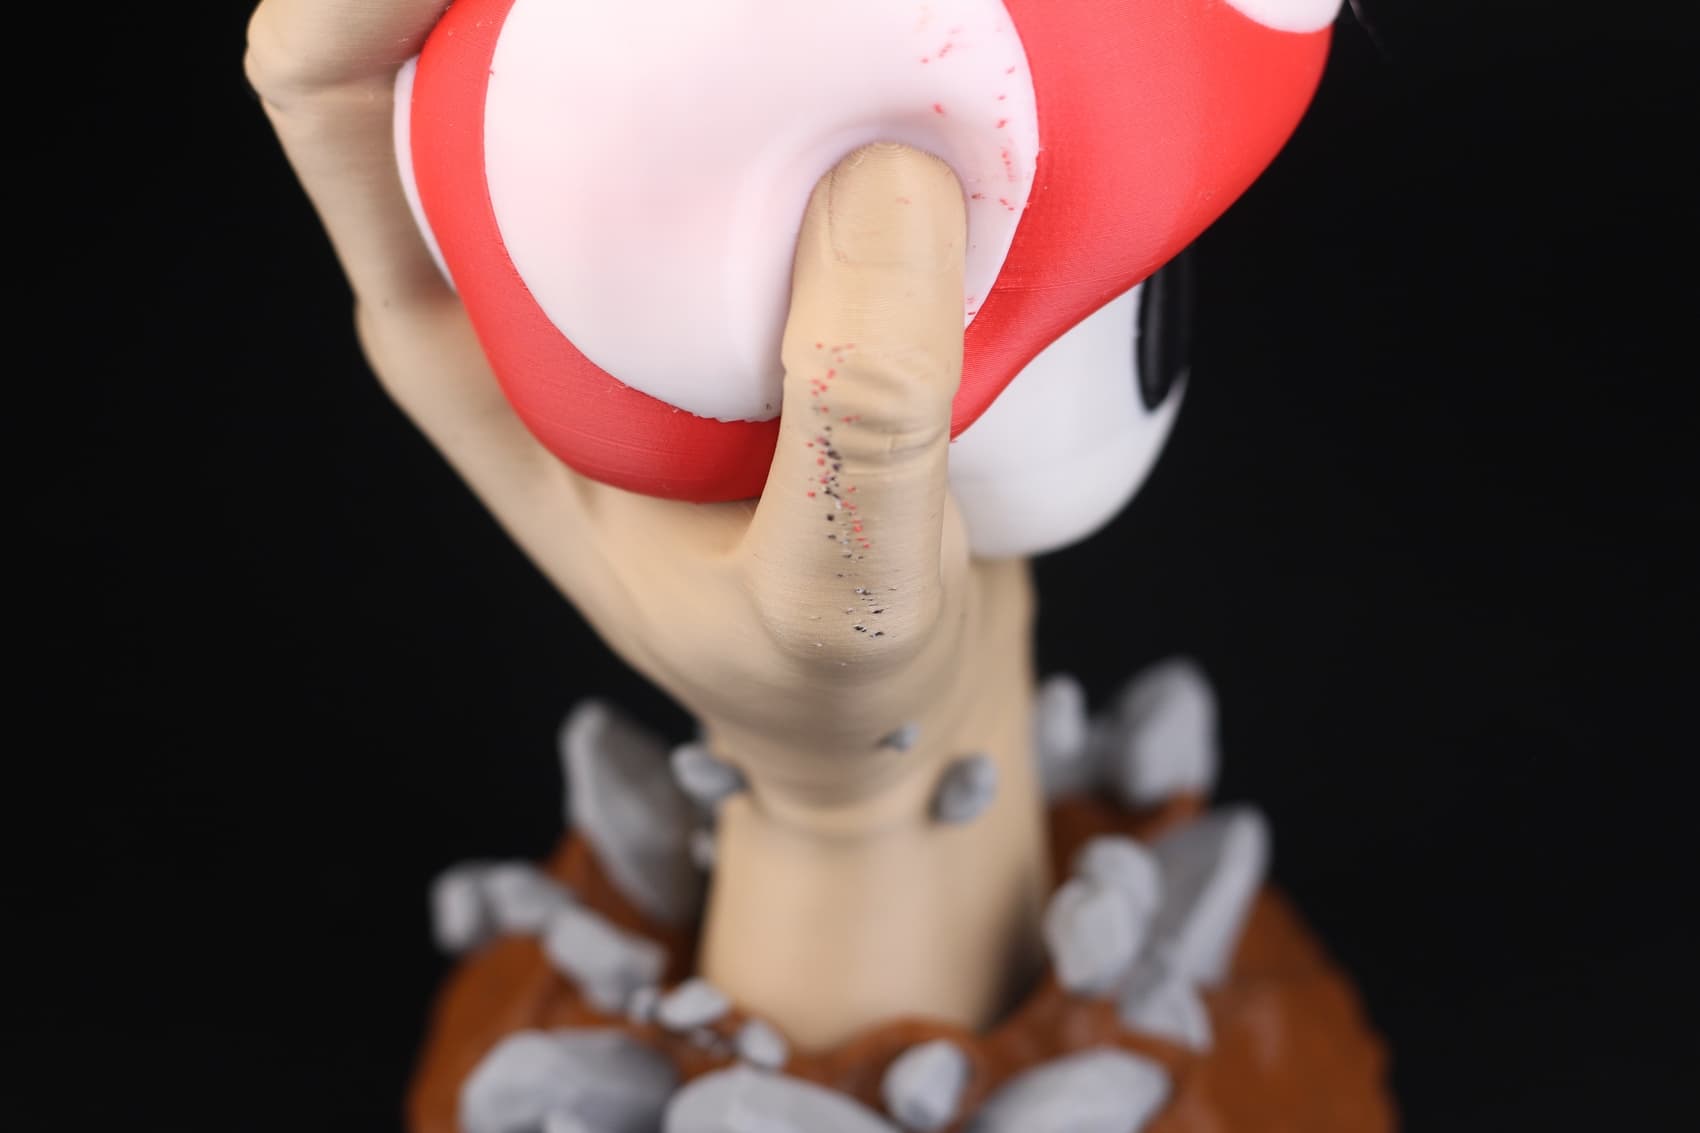
A small issue on the left eye can be seen on the model. This is caused because of a filament tangle in the AMS which was probably caused by me.
IMG_4665_result
The printer stopped and waited about 8 hours for me to interact with it. I pulled out the filament, got rid of the tangle and resumed the print.
Unfortunately, the printer did not perform another purge, and started printing with not enough filament in the hotend. When it started printing the eye, there was no filament in the nozzle so it missed a layer.

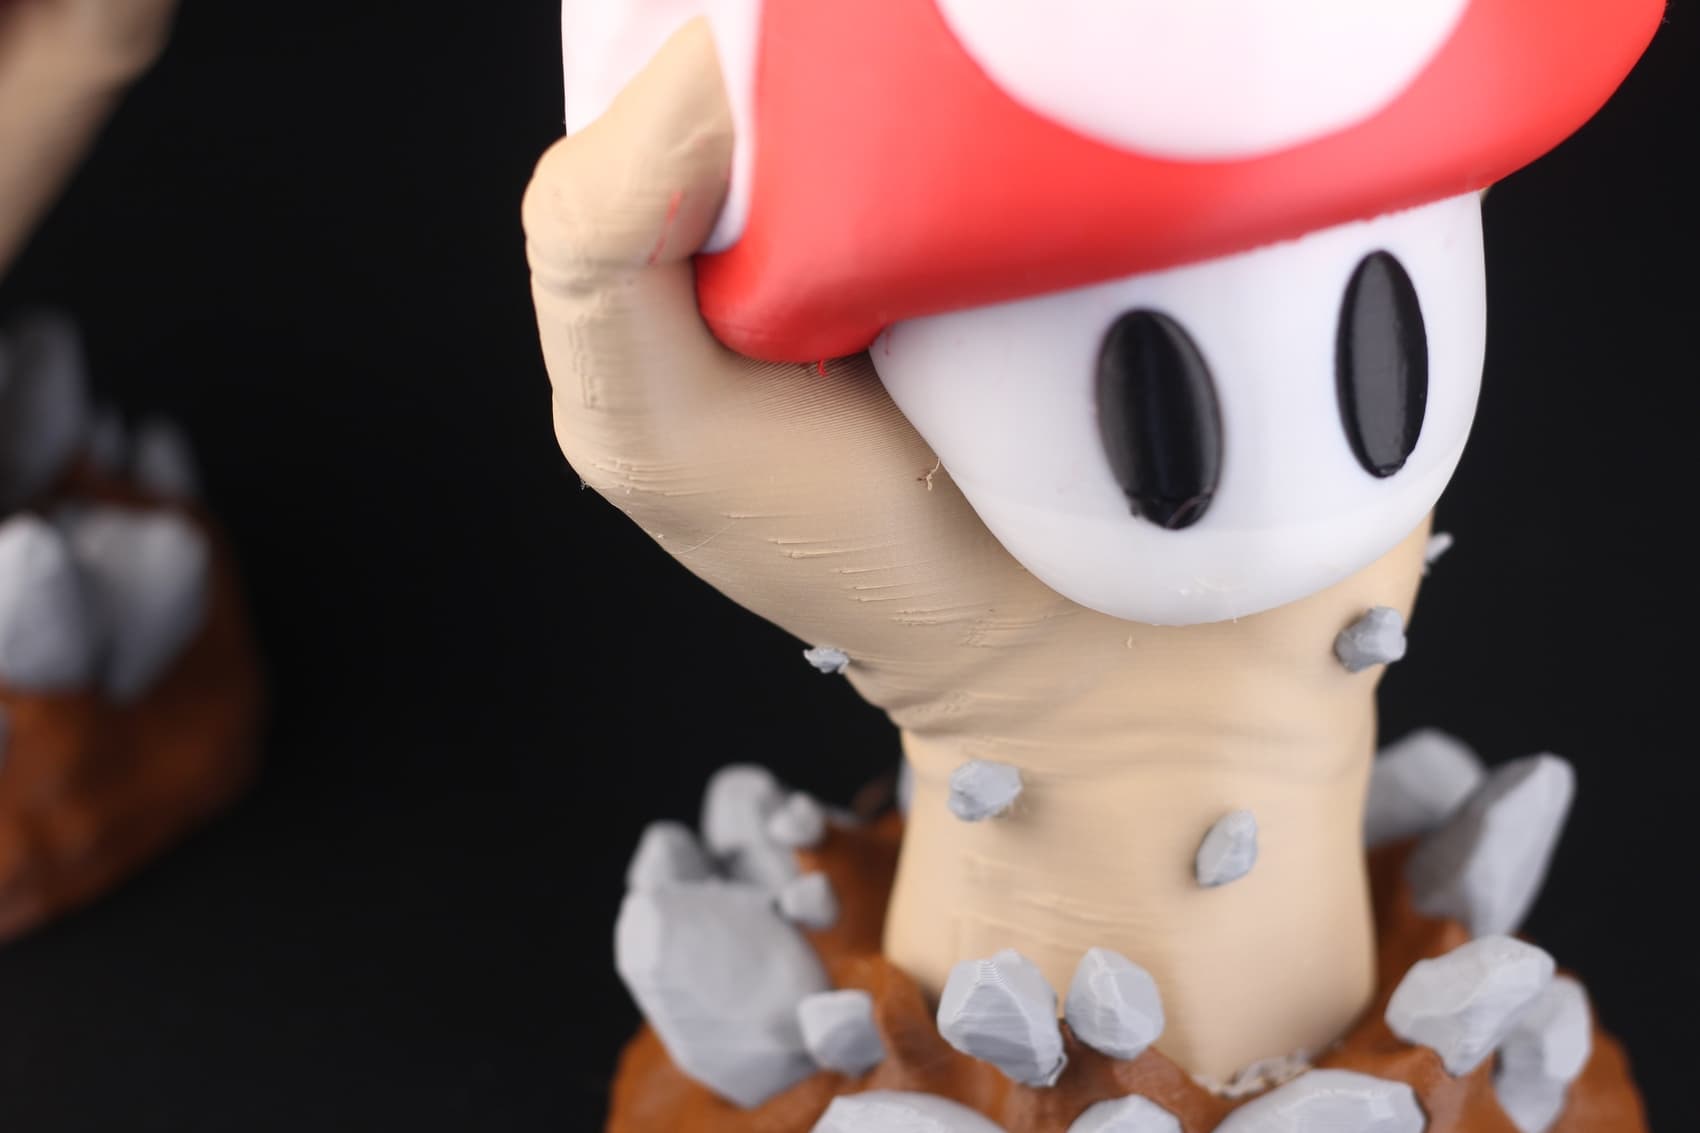
The Z seam also needs careful positioning. I forgot to align it according to my needs, and as you can see, the Smart alignment isn’t super smart with these models. All three prints have different layer starts.
IMG_4670_result

Finally, let’s talk about waste. The print tool about 74 hours to complete. I don’t have an exact number because I can’t be sure when the print stopped with that filament tangle.
X1-carbon AMS purge amount
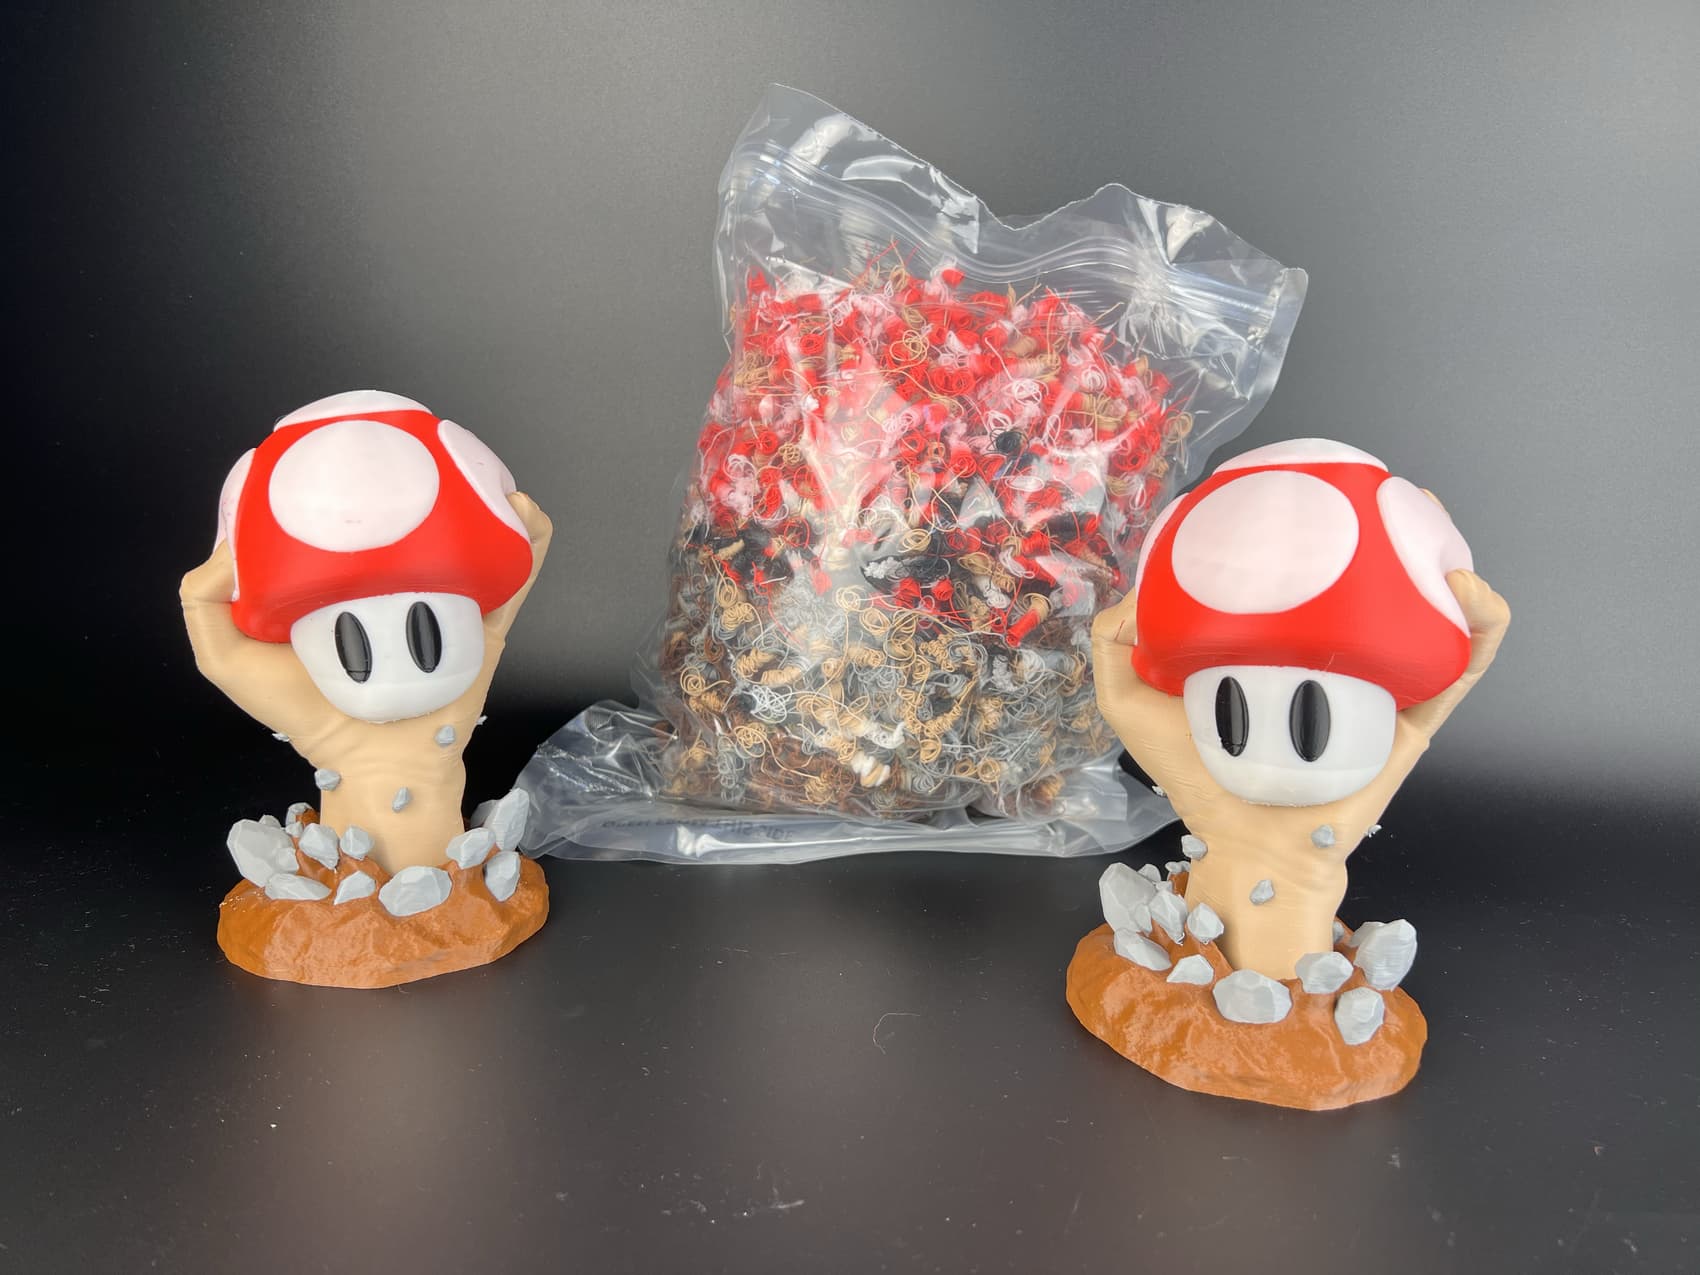
Every model weighs ~294g so ~885g of filament was used to print the models.
IMG_1270_result
The purge amount weighs ~765g.
IMG_1271_result

Quite a lot of waste. Remember that this amount of waste would be the same if I were to print a single model, or the three models I did now. You decide if it’s a lot or not.

I managed to print with 6 colors by replacing the brown filament with red, and grey with black after the bottom sections were printed. The change is super simple to do. Just remove the filament and insert the new one into the AMS.

If you have other questions, please post below. It’s hard for me to reply on every question on multiple social media posts, and I would like to keep the information contained into a single thread. :slight_smile:

1 Like

could you try a simple print for me ?
just the multi color calibration print or so but wiht the following

first print no tower, so it only purge but on minimum value’s like 70 - 40 or so
second print only with purge tower ( same value’s preffered )
and last print with both of them , not sure if it double the waste amount or splits the waste amount between tower and back

also i stil feel that those purge value’s are way more then needed , on my pallet i used way lower value’s with out color bleeding

there is one more thing you could try , but not sure if bambu slicer got that
prusaslicer got a option to only make a waste tower when changing colors , this will prevent printing a tower unless it changes the filmanet , but can cause collissions ofcourse
as it seems the front is already taken with the purge line so you could place the tower there as it then got the full widht of the purge line to lower with out causing collisions, this should decrease the waste by a lot

this are only a few idea’s :smiley:

When doing multi color prints, the most important thing to tune is the purge amount. It doesn’t matter too much if you do a longer purge in the back, or if you also use a purge block.

So doing multiple prints with the same settings doesn’t actually provide a lot of useful information.

The best way to get great prints is doing a small calibration model with the colors you plan to use. This way you can ensure you don’t use a huge amount of purge when transitioning from grey to white for example. But you would need to at least double or triple the amount of purge when going from a darker color to white.

I hope Bambu will tune the purge amount for their filament profiles. That way, it will be super easy to simply load the filament which is automatically detected, then the correct purge amounts will be set in the slicer.

Or at least this is what I’m hoping to see over time.

2 Likes

This is awesome! I’m so ready to be a Backer and this helps tremendously :metal::metal:

For the filament swap, did you hot swap or set a pause at Layer X; like I might do on a single extruder, multi-color print?

Hot swap. When the printer was using a different filament.
The AMS is smart enough to simply load the filament and carry on as nothing happened.

1 Like

Hi! Thank you for your posts about the Bambu.
Could you please share your coloured version of this print, or even the .3mf for Bambu?

Sorry, I don’t have it anymore.
But it should be pretty easy to color it. It took me about 10 minutes if I remember correctly

What happened to the Resurrection model? Think link appears to be dead. Do you still have the STL?